
Designer
![]() The designer offers you the tools and features to personalize the chosen template or theme. It does not offer drag and drop elements or JavaScript / CSS frameworks. Usually these techniques lead to slow and low quality websites which are already abundant on the web. Instead the road of clean and structured code is chosen, allowing you to create a high quality, lightweight, super fast and beautiful website.
The designer offers you the tools and features to personalize the chosen template or theme. It does not offer drag and drop elements or JavaScript / CSS frameworks. Usually these techniques lead to slow and low quality websites which are already abundant on the web. Instead the road of clean and structured code is chosen, allowing you to create a high quality, lightweight, super fast and beautiful website.
We kept the designer as user friendly as possible, but with a lot of features comes a steeper learning curve. It is recommended to learn the basics of HTML and CSS. If you don't want to invest the time and energy required, it's safe to skip this page.
These are the other options for a design that do not require technical knowledge:
Navigate to Settings > Layout and click on the Designer tab. Then click Start. The designer itself is not suited for use on a mobile phone. We recommend using a large screen (at least 1920x900 pixels) to work comfortably with the designer.
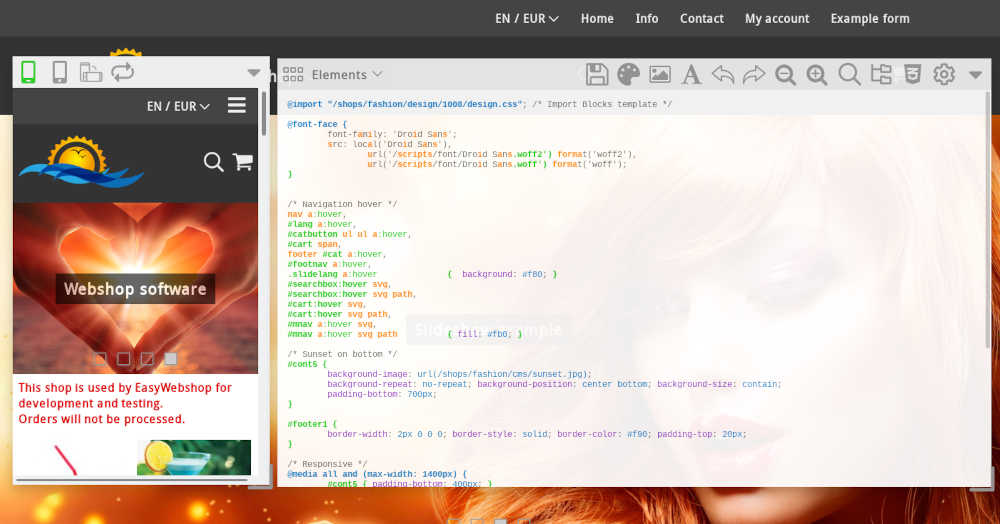
The designer consists of the preview in the background, a window with the mobile view of your website and the designer window.
Mobile View
Most people will visit your website with a smartphone. The mobile view gives you an example of how your website will look on a small screen.
Make sure that your website does not become too wide to prevent a horizontal scroll bar to appear. All templates are mobile friendly by default, but the designer gives a lot of freedom so this can be disrupted.
The icons at the top allow you to view at different resolutions.

The Refresh icon allows you to refresh the scripting in the website to see the latest version.
Design window
Below all icons in of the toolbar are explained. By default only the icons for the basic features are shown. Click the Preferences icon and activate Advanced mode to see all the icons.

My designs
The first icon gives you an overview of your personalized designs.
- Add design
- With this button you can add a new design or copy a design from another webshop.
- Publish
- After publishing, the design will be live and visible for your visitors.
- Edit
- This will allow you to edit the name, comments and copy rights of the design.
- Delete
- This action allows you to delete the design. This action cannot be undone.
You will have to confirm if you want to delete a design. Deleting a design cannot be undone. You will have to create a new design instead.
Elements
Elements form the HTML structure of your website. After choosing an element, you will be presented with a web form that allows you to modify the properties of the element.
There are many elements and properties that can be customized with the web form. The main element is Webpages' body tag. This form will automatically modify the underlying CSS selector.
Properties that have already been customized are indicated by a green background in the form field. Leaving the value of a property blank will remove the property.
Subelements
Some elements contain subelements. Clicking on the links will bring up a new form which can be used to modify the properties of the sub-element.
Media
Properties of elements may only apply for certain screen sizes or in the print version. Clicking on the links adjusts the properties of the element for a particular medium.
Save
Use this icon to save the design. This will not publish the design.
Colors, Images and Font type
These icons are a copy of the features in basic layout management. They are shown here also for easy access.
Structure
The structure icon allows you to modify the HTML structure of the website. You can add, move and delete objects.
There are visible objects (search function, shopping cart, language selection, navigation) and invisible containers that are used to structure the website. Containers are typically used to group elements or add backgrounds.
You can make adjustments to the structure by dragging elements or by using the Up and Down arrows. You can add a new element by clicking on the Add button at the bottom. To remove an element, click on the Delete icon.
Your web browser will update the design example automatically. If the update does not happen automatically, click Save in the design window and then Reload in the mobile view.
Customizing CSS
Updating CSS allows you to modify the layout codes (CSS code) of the website and is the most important feature of the designer.
CSS - Cascading Style Ssheets is not a programming language but a style language that can be used to define the formatting of website elements.
Customizing CSS, is that something for a layman?
CSS can be easily learned. We recommend this method for users who want to personalize their own website and invest time to learn about CSS.
Useful links with information about CSS:
- W3Schools - tutorials to learn CSS
- CSS-Tricks - our favorite with lots of CSS information
Help on CSS customization
For CSS code modifications our help desk cannot provide support. Adding CSS support would mean doing custom web design and that would make EasyWebshop much more expensive. We have the Summer of web design for assistance in creating a personalized design.
We don't recommend letting web designers log into your webshop directly or with an administrator account. This sometimes leads to discussions about changes that were not wanted. Only let people log in to your shop that you trust! Instead, the web designer can create a Basic webshop and create the design in this webshop. You can then copy the design to your webshop with the copy feature.
While editing the CSS, extra icons appear for Undo and Redo changes, Smaller and Bigger text and a search function. Enter a text in the search bar to find the text in the CSS code. Press Enter to highlight the text if found and to go to the next instance if any.
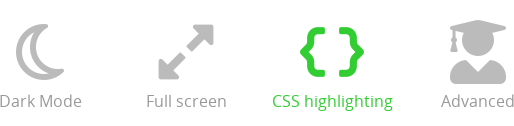
Preferences
Here you can turn on and off the dark mode, full screen and syntax highlighting of the CSS code. There is also an option to make the design window transparent. The preferences relate to the design window; therefore, not to the website.
How do I change property X?
Changing the background
Choose the element you want, for example Webpage. At Background Image, click the Edit Image icon. Choose an image from the list or Upload a new image.
You can also purchase an image using the Gallery. If you want to use the image on a page, we recommend the Web format. For backgrounds, we recommend a Large format.
Click Insert to set the image as the background. After the background image is set, an icon Delete image also appears.
Changing Buttons
Choose the element Webpage and the sub element Buttons. In the form, properties such as color, size, border style, etc. can be adjusted.
The Buttons mouse-over sub element allows you to change the style of the buttons when the mouse is hovered over them. For example, the button can be given a lighter color.
Customizing colors
The easiest way to change colors is in the CSS code. Color codes look like #ffffff or rgba(255, 255, 255, 0.5). With the latter notation, the last parameter (0.5 in the example) is the transparency.
Useful links to compose colors:
- Color Designer - easily generate color palettes
- Color Combos - assemble color combinations
Customizing fonts
You can change the font by selecting an element and adjusting Font in the form.
By default, all our templates have one font set for the main Webpage element. It is possible to set different fonts for different elements. We do not recommend this to keep things uncluttered.
Frequently Asked Questions about the designer
- I still see the old version of the website
- This is usually because the old images are still in the cache of the web browser. A web browser (Internet Explorer, Firefox, Google Chrome...) saves web pages and images on your hard disk. This way, at your next visit, the page will load faster. When you visit the page, you will see the old version of the photo on your hard drive and not the live version on your website.
To solve this problem: navigate to the shop page and click Refresh page or Reload page.
You can also use the shortcut keys: F5 or CTRL + R (Command + R on Mac). The most recent version of the web page is now loaded.
Also check that your design is Published. - The favicon is not displayed
- Use a recent browser. In some old versions of Internet Explorer no favicon is displayed.
Also connect a domain name to your shop. Some browsers display the favicon of EasyWebshop if no domain name is connected.
Next page: Editing texts and webpages
- Introduction
- Product management
- Online store configuration
- Account and shop settings
- Payment methods and Payment Service Providers
- Invoices and Terms & Conditions
- Setting shipping costs
- Discounts and surcharges
- Registering and transferring domain names
- Multilingual shop
- Connecting to external platforms
- Personalized web addresses
- Managing multiple webshops (Multishop)
- Automatic emails to customers
- Designing a beautiful layout
- Order management
- Marketing
- Modules
- Backups and exporting data
- Email and web mail
- Administrator accounts
- High quality photos
- Two-factor authentication
- Labels
- Meta tags - Website verification
- Live chat
- Slideshow
- Visitor analysis - Google Analytics
- Filters
- Point Of Sale (POS)
- Form fields
- Digital or virtual products
- Symcalia reservation system
- Guestbook
- Contacting the helpdesk